
Hamilton T1 transport ventilator set-up guide & pre-use checks
exp date isn't null, but text field is
- The Hamilton T1 ventilator is to be used for internal hospital transfers of PICU ventilated patients.
- The same ventilator is used for all Paediatric ScotSTAR transfers.
- It can ventilate all patient sizes and can give from 21 – 100% oxygen.
- It can deliver Non-Invasive Ventilation (NIV), HiFlo as well as invasive ventilation modes. We will not be using it for mobile HiFlo.
- It is not MRI compatible.
- Patient monitoring during transfer will be delivered by our standard PICU Philips monitors (there is an ability to monitor SpO2 & etCO2 that we are not using on the Hamilton T1).
- The Hamilton T1 is stored in the far right of the equipment store & should always be plugged into mains power when not in use

|

2.5 Circuit set-up
There are 2 potential set-ups for the transport ventilator and each requires a slightly different arrangement for checking of the flow sensor & adaptor - these are weight banded:
|
<15kg: For this document we will term this group NeoPaeds, |
|
| This set-up includes: |
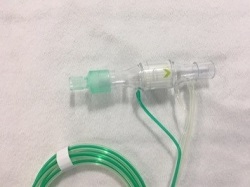
Pink expiratory flow valve (comes separately from other items below) Blue/White vent tubing Blue/White flow probe Dumbbell shaped adaptor |
|
≥15Kg: This group uses standard set up for adults |
|
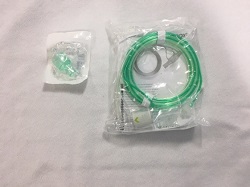
| This set-up all comes in the same bag & includes: |
Blue/grey expiratory flow valve White dual lumen vent tubing Blue/White flow probe Funnel shaped adaptor |
This table summarises the different set ups:
|
|
Valve (type/colour) |
Flowsensor |
Circuit |
Adaptor for pre-use check |
|
NeoPaeds |
Neonatal (pink) |
Neonatal/paeds |
Paediatric |
Dumbbell |
|
Adult |
Adult (Blue or grey - white/plastic) |
Adult |
Adult |
Funnel |
In-line suction should be used at all times where possible (ETT ≥ 4.0)
Please also read section 9.1 if further is required for highly infectious disease transfers
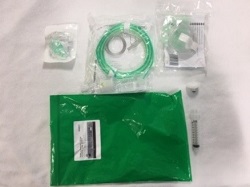
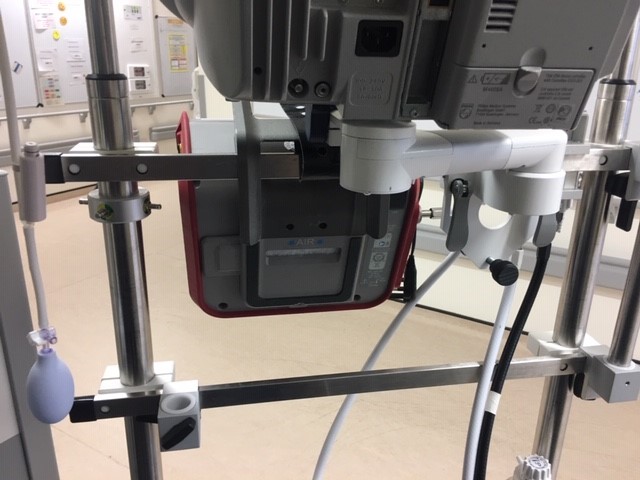
All necessary equipment is stored by the Hamilton-T1 in the PICU Store Room
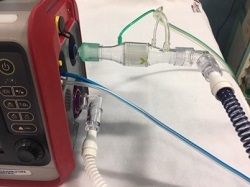
In order to maintain staff safety we should adjust the circuit set-up with the following filters
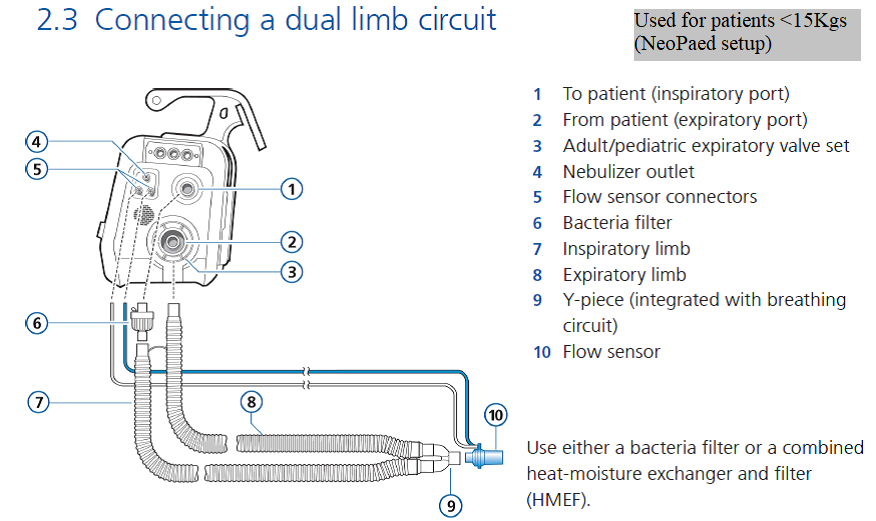
Dual limb circuit (<15kg)
Attach filter to expiratory port (Intersurgical Clear Guard Midi - ref 1644000)

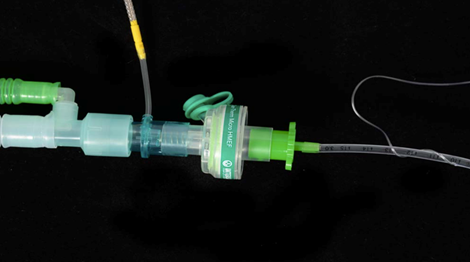
<4.0 ETT patient-end of circuit should be set-up as detailed below

ETT ≥4.0 should be set up as follows, with appropriate sized ventilator tubing & flow sensor & in-line suction as per the patients weight

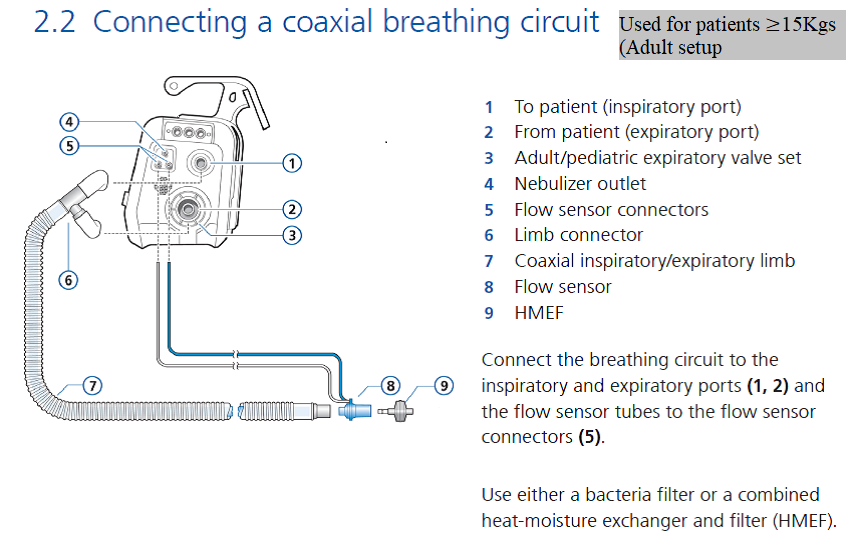
Co-axial (Paed/Adult) ventilator tubing (≥15kg)
A - Attach connector to inspiratory port (Intersurgical Connector 22M-22F- ref 1961000S)
B - Attach filter to expiratory port (Intersurgical Clear Guard Midi - ref 1644000)
In-line suction should be used at all times where possible (ETT ≥ 4.0)
ETCO2 should be placed “above” the pink Pharma HME-F filter (this allows VT up to 900ml) as detailed below

Ayers T-piece set-up
As routine we should also ensure the T-piece has the bacterial/viral filters (Intersurgical HME-F 14410000) attached as shown and gas supply to the T-piece should be switched off when not in use
These filters should be changed every 24 hours
T-Piece < 4.0 ETT
T-Piece 4.0 ETT and above
Use small ETCO2 if ETT is 4.5 or less and large ETCO2 if ETT 5.0 or above

NeoPaeds Flow Sensor Check |
Adult Flow Sensor Check |
 |
 |
NB Remember to remove the “pre-use check” adaptor prior to use on a patient
O2 test check if needed – we don’t do this routinely

NBThe Pinsp is actually a DP (ie Pressure above PEEP)
Set Ti for ventilation last (as will reset if you adjust weight/height settings)

Auto-set alarms can be made only adult mode
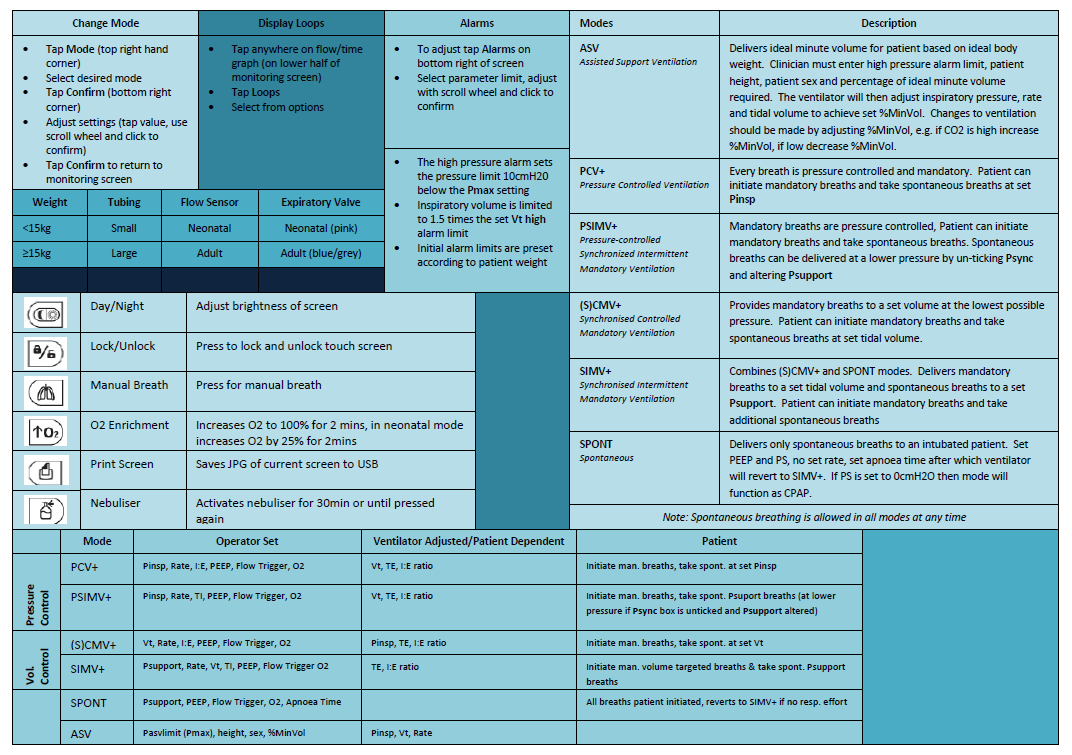
6.2 Quick reference guide
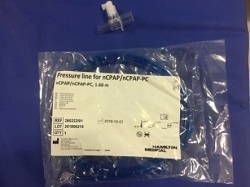
NoxBox can be attached to the Hamilton T1 using the neo/paeds tubing only:
| 7.1 Access NoxBox pack | 7.2 Open contents | 7.3 Select components |
 |
 |
 |
| 7.4 Attach funnel to iNO. Attach sampling line to delivery device | 7.5 Attach to inspiratory port (blue) of Hamilton T1 | 7.6 Remove adaptor from nCPAP pressure pack (in vent tubing pack) |
 |
 |
 |
| 7.7 Attach adaptor between inspiratory limb (blue) and swivel vent connector | 7.8 Attach NoxBox sampling line to adaptor | |
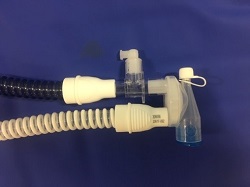 |
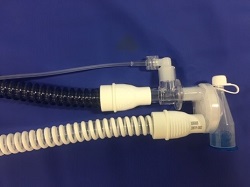 |
Secure for patient transfer as noted below:
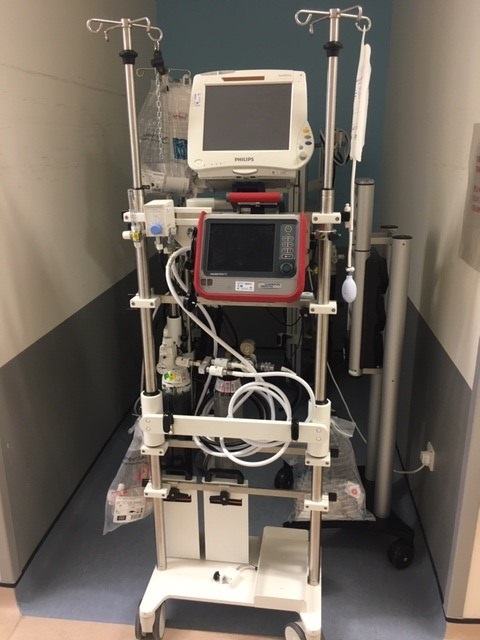 |
 |
Attach onto monitor stand as noted and secure using leather strap
Connect ventilator tubing to oxygen splitter to enable blended FiO2/Air to be delivered if needed as well
Parameter |
Definition |
| Apnea Backup | A function that provides ventilation after the adjustable apnea time passes without breath attempts. If "Automatic" is enabled, control parameters are calculated based on the patient's IBW. |
| ETS | Expiratory trigger sensitivity. The percentage of peak inspiratory flow at which the ventilator cycles from inspiration to exhalation. |
| Flow trigger | The patient's inspiratory flow that triggers the ventilator to deliver a breath. |
| Gender | Sex of patient. Used to compute ideal body weight (IBW) for adults and pediatrics. |
| I:E | Ratio of inspiratory time to expiratory time. Applies to mandatory breaths. |
| %MinVol | Percentage of minute volume to be delivered in ASV mode. The ventilator uses the %MinVol, Pat. height, and Gender settings to calculate the target minute ventilation. |
| Oxygen | Oxygen concentration to be delivered. |
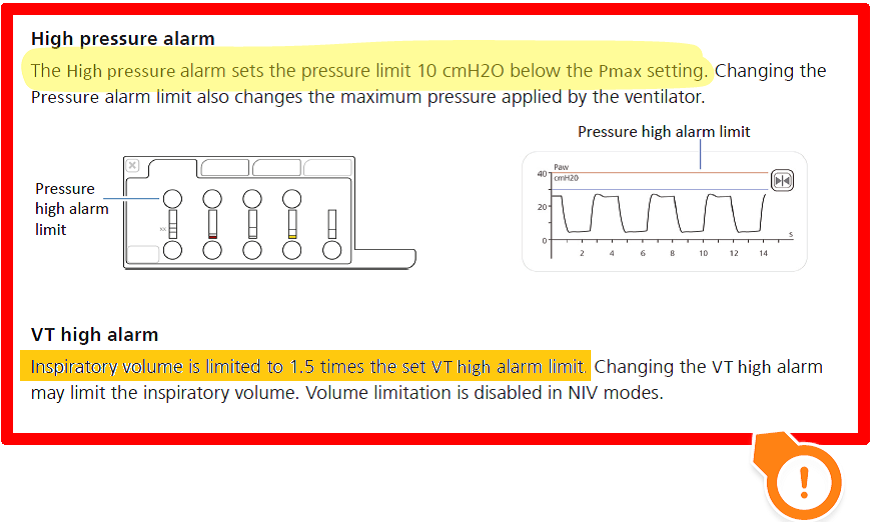
| Pasvlimit | The maximum pressure to apply in ASV mode. Changing Pasvlimit or the Pressure alarm limit automatically changes the other: The Pressure alarm limit is always 10 cmH2O greater than Pasvlimit. |
| Pat. height | Patient height. It determines the ideal body weight (IBW), which is used in calculations for ASV and startup settings for adults and pediatric patients. |
| Pcontrol | The pressure aditional to PEEP/CPAP. |
| PEEP/CPAP | Positive end expiratory pressure. |
| P high | The high pressure setting in APRV and DuoPAP modes. Absolute pressure, including PEEP. |
| Pinsp | Pressure (additional to PEEP/CPAP) to apply during the inspiratory phase. Applies in PSIMV+ IntelliSync and NIV-ST. |
| P low | The low pressure setting in APRV. |
| P-ramp | Pressure ramp. Time required for inspiratory pressure to rise to the set (target) pressure. |
| Psupport | Pressure support for spontaneous breaths in SPONT, NIV, and SIMV+ modes. |
| Rate | Respiratory frequency or number of breaths per minute. |
| Sigh | Breaths delivered at a regular interval (every 50 breaths) at a pressure up to 10 cmH2O higher than non-sigh breaths, as allowed by the Pressure alarm limit. |
| Thigh | Length of time at the higher pressure level, P high, in DuoPAP and APRV modes. |
| TI | Inspiratory time, the time to deliver the required gas (time to reach the operator-set Vt or Pcontrol value). |
| TI max | Maximum inspiratory time for flow-cycled breaths in NIV, NIV-ST, and SPONT in neonatal modes. |
| TI low | Length of time at the lower pressure level, P low, in APRV mode. |
| Vt | Tidal volume delivered during inspiration in (S)CMV+ and SIMV+ modes. |
| Vt/kg | Tidal volume per weight. |
Last reviewed: 15 April 2019
Next review: 01 April 2022
Author(s): M Davidson, T Geary, K Martin
Version: 1.3
Approved By: PICU Guidelines Group