When the team are ready to begin the procedure should be carried out in the following order:
- Set the Scene
- Intubation pause
- Patient optimisation
- Pre-medication
- Laryngoscopy
- Confirmation of ET tube placement & secure
- Post procedure management
1. SET THE SCENE
Choice of Intubator
Audience
- When first learning to intubate, a large audience (especially parents or multiple senior colleagues) is reported to increase the stressfulness of the situation
- The novice intubator may not have the confidence to ask to reduce the audience but their instructor does
Reassure
- This is commonly reported to be a stressful situation for a novice intubator
- They may appreciate being reminded that the child is in safe hands and that the overall clinical care of the infant is the responsibility of their supervisor not them. They will be told to stop the attempt if the baby is desaturating etc, they do not need to worry about the infant’s numbers, the duration of the attempt etc.
2. INTUBATION PAUSE
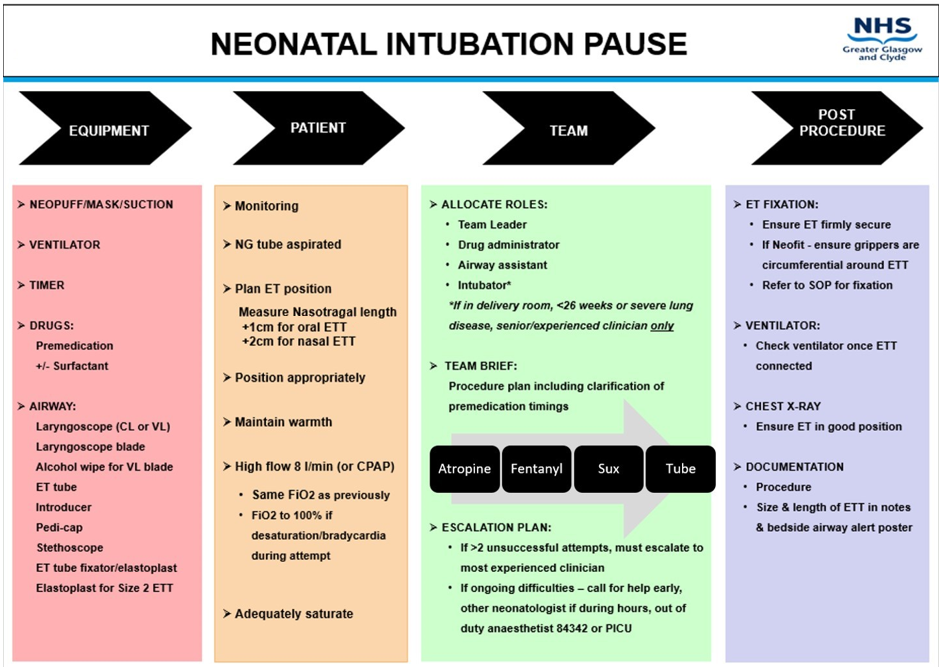
The intubation pause is a planning and safety prompt to help prepare the team and the baby for intubation. It is a structured checklist designed to enhance organisation and team communication, and ensure intubation is carried out as safely and controlled as possible. It should be attached to all airway trolleys and performed before every intubation, where time allows.
3. OPTIMISE PATIENT
A recent RCT has shown improved intubation success rates and less physiological instability if the baby is on high flow during the intubation attempt, NNT=7.10 As this is a safe, reasonably straightforward intervention that improves intubation safety and success, we aim to implement it as the standard of care. The baby would be placed on 8l/min of high flow on the same oxygen they were on before the attempt. If they desaturate during the attempt to <80%, the oxygen is turned up to 100%.
Some consideration needs to be given before the intubation attempt how to deliver this to the infant. If the baby is already on high flow via vapotherm before the intubation, then it is reasonable for them to stay on it during the attempt and have a separate ventilator set up. If the baby is already on high flow delivered by a ventilator (either SLE or Fabian), it is reasonable for them to be left on it until intubated then change the circuit on the ventilator and change to ventilation. If the baby is on CPAP or DuoPAP, it could be considered to use these as the form of respiratory support during the intubation attempt. However if in this case, the CPAP/DuoPAP on the baby’s face can make it more challenging to obtain a view performing direct laryngoscopy, less of an issue with VL.
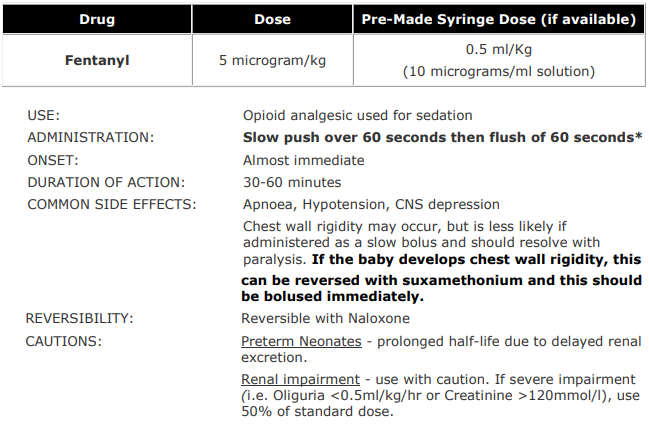
The other challenge is performing mask IPPV if so required. The rate of administration of the fentanyl is now 60 seconds with a 30 second flush. This is still slow enough to have a low incidence of chest wall rigidity but fast enough so that routine IPPV before attempts should not be required. If IPPV is required either before or during attempts, the high flow or CPAP needs to be removed so that a seal can be obtained with a facemask, then replaced again for the next attempt.
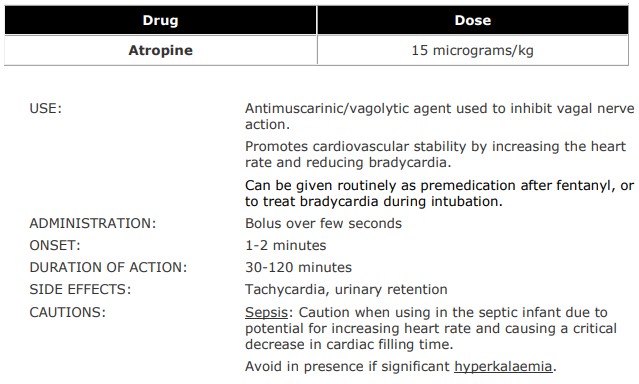
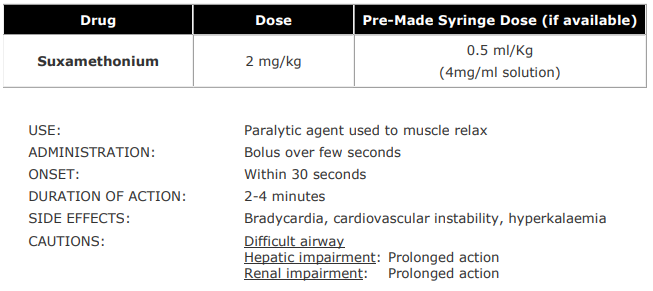
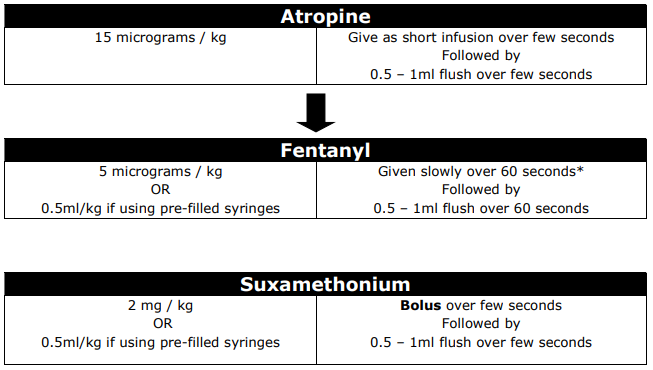
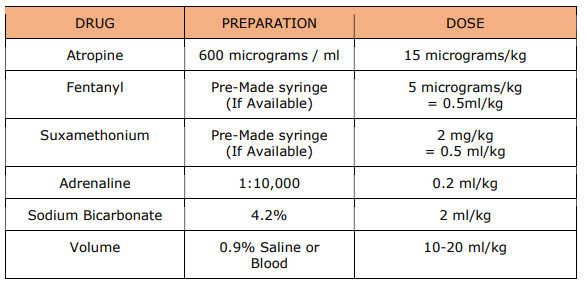
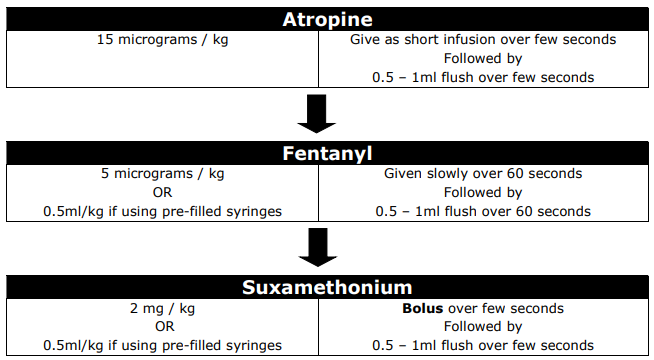
4. PRE-MEDICATION
5. LARYNGOSCOPY & ET TUBE INSERTION
- Holding laryngoscope in the left hand, use right hand to open the mouth wide (premedication can cause some spasm that may need to be overcome)
- Gently insert the blade to push the tongue to the left and then advance towards the throat
- Use the uvula to help maintain position in the midline, if uvula not in the midline, reposition, the scope is usually heading to left
- Advance the blade forward gently
- Lift laryngoscope handle in a forward and upward motion
- Avoid a levering action against the top gum
- Instructors hand on the infants neck can feel the blade tip (to help guide if the scope is too far in or not far enough)
- Cricoid pressure can be applied using the little finger of the left hand, or by an assistant (care should be taken not to exert excessive pressure)
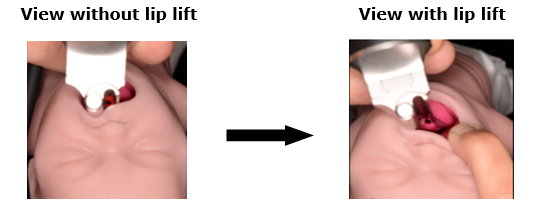
- With the video laryngoscope, an airway assistant may also lift the top lip of the infant to allow more space if obtaining a direct airway view and to allow more space for insertion of the ET tube in the mouth, as shown below:
- Use suction only if secretions are impairing view
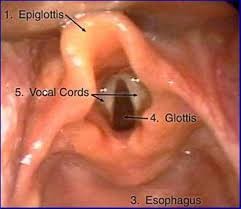
- Bring the posterior larynx and vocal cords into view, as shown below:
- Hold the tube high up and with the natural slope facing forward, as it is easier to direct
- Feed the tube in from the side to allow visualisation of it passing through the cords
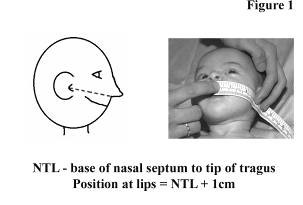
- Use the black marker near the tip of the tube as a guide to depth of insertion initially
- Adjust to previously measured naso-tragal +1cm measurement
- Be cautious as to how far to insert the tube as it is often too far in
- Secure the ETT tube against the roof of palate or firmly at the lips
- Carefully remove laryngoscope and introducer (if used)
- Connect CO2 detector and ventilation circuit to confirm correct ETT position (see below)
- Secure ET with an appropriate fixation device, ensuring a good seal to the skin and avoiding traction on the ETT
- Provide IPPV once ET position confirmed and throughout securing process
- Attach ETT to ventilator and adjust settings as required
- Move infant back into position carefully, ensuring ET is secure when moving infant and using a 2 person technique to avoid accidental extubation
6. CONFIRMING ET TUBE PLACEMENT
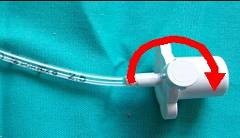
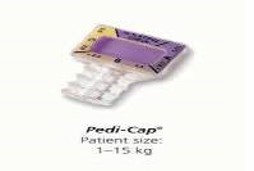
End-tidal CO2 monitoring is recommended to allow immediate confirmation of a correctly positioned ET tube. This can be achieved with a colorimetric device or a side stream CO2 monitor 14,15. The most widely used device in the West of Scotland is Pedi-cap. Pedi-cap is a non-toxic chemical indicator which rapidly responds to exhaled CO2 with a simple colour change of purple to gold. It is easily attached to the ET tube and breathing device and the result should be interpreted following 6 positive pressure breaths.

As end-tidal CO2 is a reflection of ventilation, cardiac output, pulmonary blood flow and metabolism, false negative results may be seen. The response may be delayed, equivocal or absent in a number of situations including:
- ET tube in right main bronchus
- Extremely low birth weight or preterm infants
- Babies with poor perfusion or in cardiac arrest
- Reduced pulmonary blood flow (e.g. cardiac anomalies)
- Severe airway obstruction (e.g. meconium aspiration)
False positive results may also be seen in contamination with gastric contents and drugs including adrenaline.
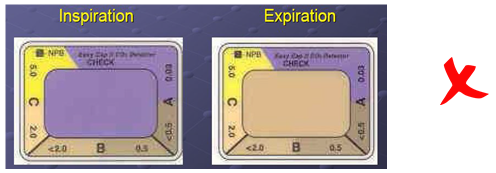
Tracheal Intubation: Purple to gold

Oesophageal Intubation: Purple to beige
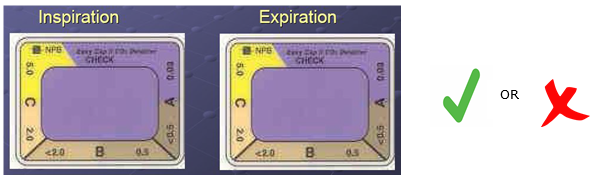
Possible Tracheal Intubation
In cases of poor or absent pulmonary blood flow and/or cardiac output, no colour change or a delay in colour change may be seen initially.
If confident in ETT placement, ensure the ET length is correct. The VL is useful in this scenario where the team can visualise the tube placement. If no Pedi-cap response, consider increasing the PIP and FiO2, while assessing other physiological indicators of appropriate ET position11, including:
- Increase in heart rate (the best physiological indicator of adequate ventilation)
- Effective chest wall movement
- Misting of the ETT on expiration
- Maintenance or improvement in the oxygen saturation (N.B. improvement in oxygenation may be slow in the presence of pulmonary hypertension)
- Equal air entry on both sides of the chest
If none of the above indicators are present, it is important to consider incorrect placement or dislodgement, where stabilisation and re-intubation is required.
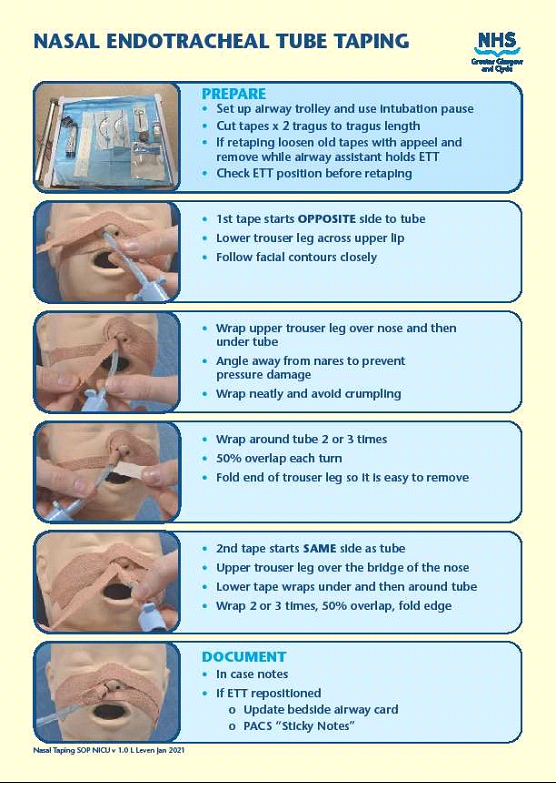
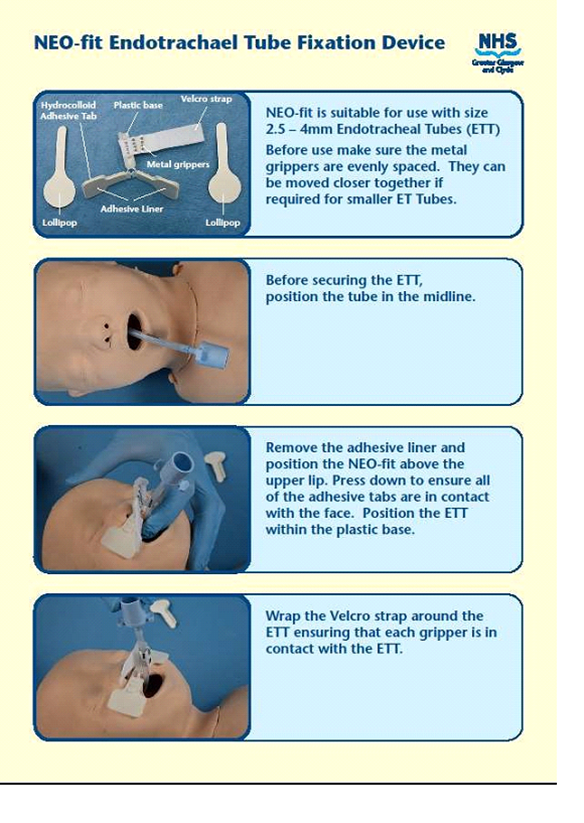
7. ENDOTRACHEAL TUBE FIXATION
Current methods of endotracheal tube fixation include:
- NEO-fit fixation device
- Elastoplast "trouser leg" method
- Neobar
Appendix 2 describes use of the NEO-fit and Elastoplast.
8. POST PROCEDURE
- Chest x-ray is gold standard in confirming correct ETT position, the ET tip should be visible 1cm above carina (T2-T3)
- Consider shortening the ETT to minimise dead space
- Ensure VL blades are sent for sterilisation as per unit protocol
- Ensure accurate documentation of the procedure including the position of the ETT on chest x-ray and whether or not adjustments were made
- Update parents

 GGC Paediatric Guidelines