
Arterial lines: priming & calibration using the Kids Kit ™ closed blood sampling system : neonatal guideline
exp date isn't null, but text field is
Objectives
This guideline describes the technique for priming and calibrating an arterial line using the Kids Kit™ Closed Blood Sampling System from Medex.
This Guideline is applicable to all registered nursing staff / clinicians working in neonatal units in Greater Glasgow and Clyde who have had the appropriate training to perform this procedure.
An indwelling arterial line may be used when:
- There is a requirement for frequent arterial blood gas monitoring
- Continuous monitoring of arterial blood pressure is required.
The WoS Neonatal MCN recommends the use of a closed circuit system to reduce the risk of infection secondary to repeated sampling from indwelling arterial lines.
A sterile technique should be used when priming the system and attaching to the patient. The intravenous fluid prescription chart should be checked by 2 nurses or a nurse and doctor against the baby’s ID band to confirm that the correct solution and rate has been prescribed.
- Trolley
- Sterile drape
- Sterile gloves
- Clinell wipe
- Heparin (1unit per ml) in 0.45% Sodium Chloride 500ml bag
- Medex closed system blood pressure monitoring kit.
- 50 ml luer lock syringe
- Extension line with clamp
- Needle / dispensing pin
- Transducer mount / monitor cable
- Asena pump
- Patient Label/Drug labels
- Assemble equipment and disposable supplies
Wash hands for sterile procedure and put on sterile gloves. Draw up 0.45% sodium chloride and heparin 1 unit per ml solution into a 50 ml syringe. Prime extension line (Fig.1).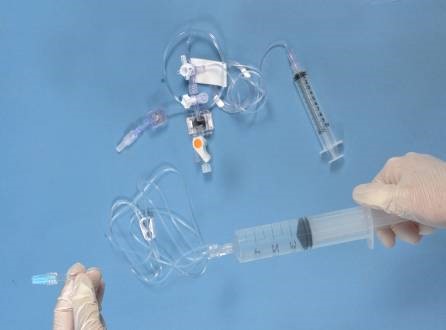
Figure 1 - Connect the extension line to the trigger end of the Kids Kit system. Turn the 3 way taps off to the patient line and flush the transducer dome and the zero 3 way tap by pressing down on the trigger (Fig 2). Attach a white bung to the 3-way tap and place in off position.
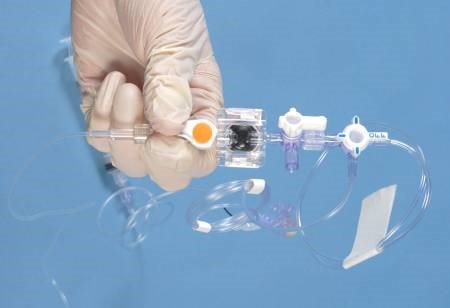
Figure 2 - Open the system to the 10ml syringe and off to the patient line and prime the flush line and syringe (Fig 3).
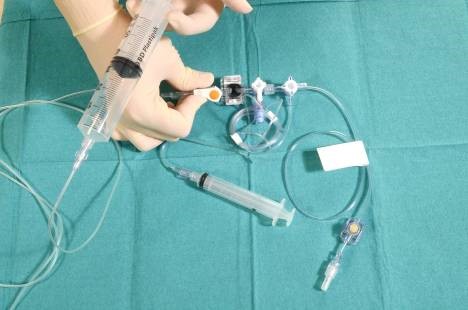
Figure 3 - Ensure any air bubbles from the 10ml syringe are removed by turning the 3 way tap open to the patient line and flush (fig 4). The 10ml syringe may require to be replenished to approximately 6-6.5ml before patient sampling. (Fig 3)
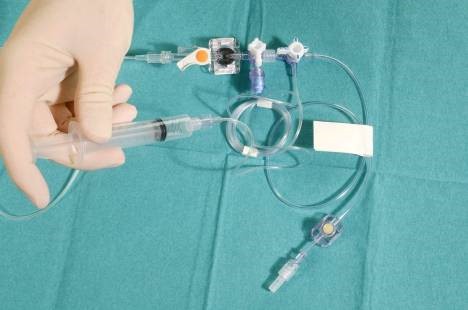
Figure 4 - Turn the 3-way tap off to the 10ml syringe. The system should now be open to the 50ml syringe and the patient line and sample port. Pressing down on the trigger and holding in a vertical position with the patient end upwards flush the system ensuring all air is expelled (fig 5).
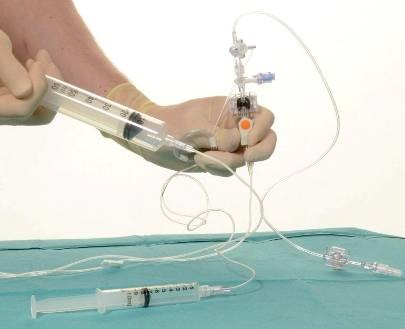
Figure 5 - Ensure both the extension line attached to the 50ml syringe and the patient t-piece is clamped before attaching the sample port end to the infant’s peripheral / umbilical catheter. N.B The connection should be directly to the UAC, or to a short extension line for a peripheral catheter, without a needle free connector (Fig 6). This will require the operator to pinch the UAC to avoid blood loss whilst the extension is connected.
N.B. The short extension line for peripheral arterial catheters should be straight, and clearly differentiable from the short t-piece extensions used for PVCs.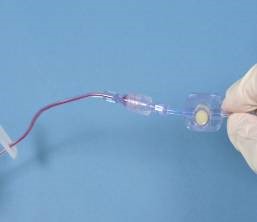
Figure 6 - Attach patient label to syringe. Insert the 50ml syringe into the Asena pump and set rate and program as per unit protocol (check with 2nd nurse).
- Remove protective cover from back of the transducer. Slide the cartridge into the grooves of the transducer mount plate. Press down on top of the transducer until an audible click is heard. Attach the blood pressure monitoring cable to the outlet at the bottom of the transducer mount (see below). Unclamp the extension line leading to the transducer. (Fig 7 & 8)
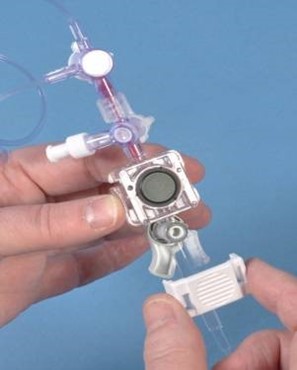
Figure 7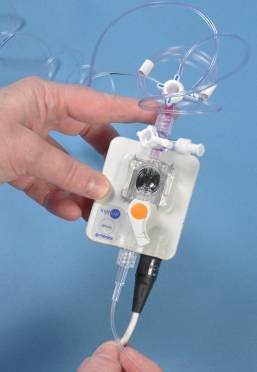
Figure 8To zero the system – open zero 3-way tap to atmosphere and off to patient. Press zero calibration button on monitor until zero complete is acknowledged (-1 to +1 mmHg). The transducer dome should be aligned approximately at the level of the right atrium.
- Turn both 3 way taps open to the patient line (fig 9). Open the clamp on the patient T-piece. Check for blood pressure wave form and recording and that the Asena pump is infusing
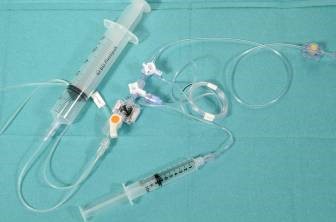
Figure 9. - Note that the pressure transducer will be in place at this stage - Clearly label the syringe and patient line as ARTERIAL LINE. The Asena pump should be clearly labelled “USE FOR ARTERIAL LINES ONLY” and placed at the top of the infusion pump stack.
Last reviewed: 09 October 2023
Next review: 09 October 2026
Author(s): L Raeside – Advanced Neonatal Nurse Practitioner, RHC, Glasgow
Co-Author(s): Original authors: Dr Andrew Powls – Neonatal Consultant PRM; Sharon Lynch – Nurse Educator PRM
Approved By: West of Scotland Neonatology Managed Clinical Network